
Photo by Firmbee.com on Unsplash
In this article, we will discuss how to transcribe and translate speech using the UI interface of the Google Cloud platform. This article differs from the previous one, which focused on live translation. Here, we will learn how to transcribe audio files in the GCP UI interface. The audio file to be transcribed is longer than 1.5 hours, exceeding the 10MB limit of Google Cloud’s online transcription. Therefore, we need to upload the file to Cloud Storage first.
Speech-to-Text UI Interface
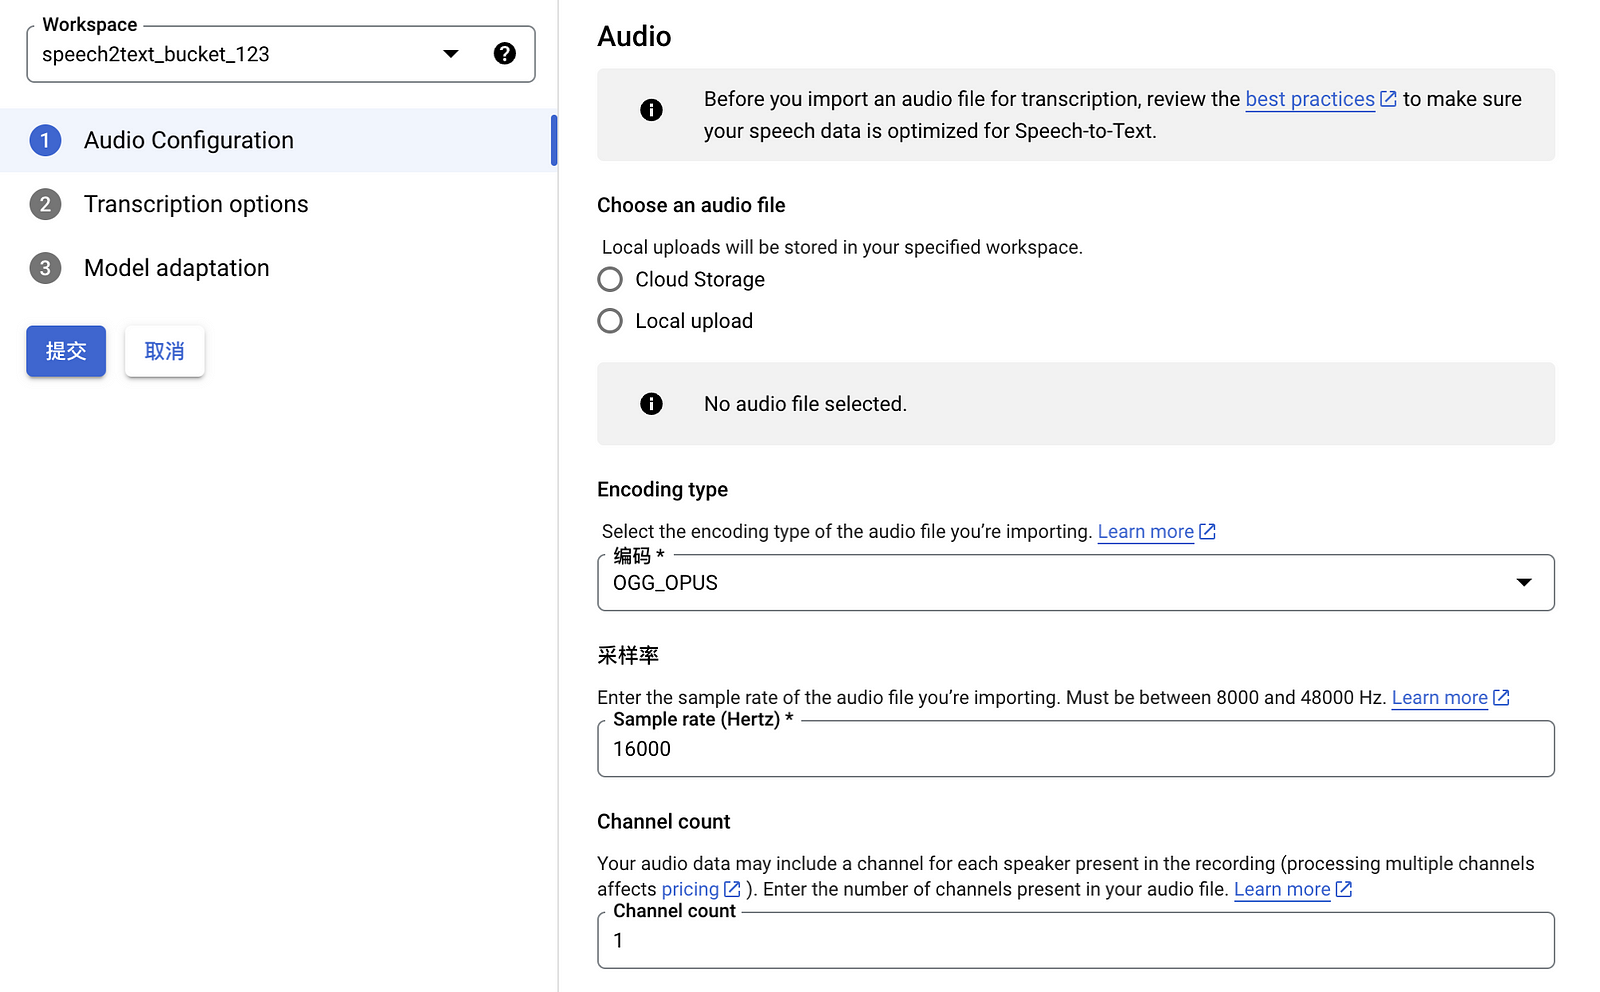
After the upload is complete, open the UI interface and create a new configuration by entering the required speech information as shown in Figure 1.
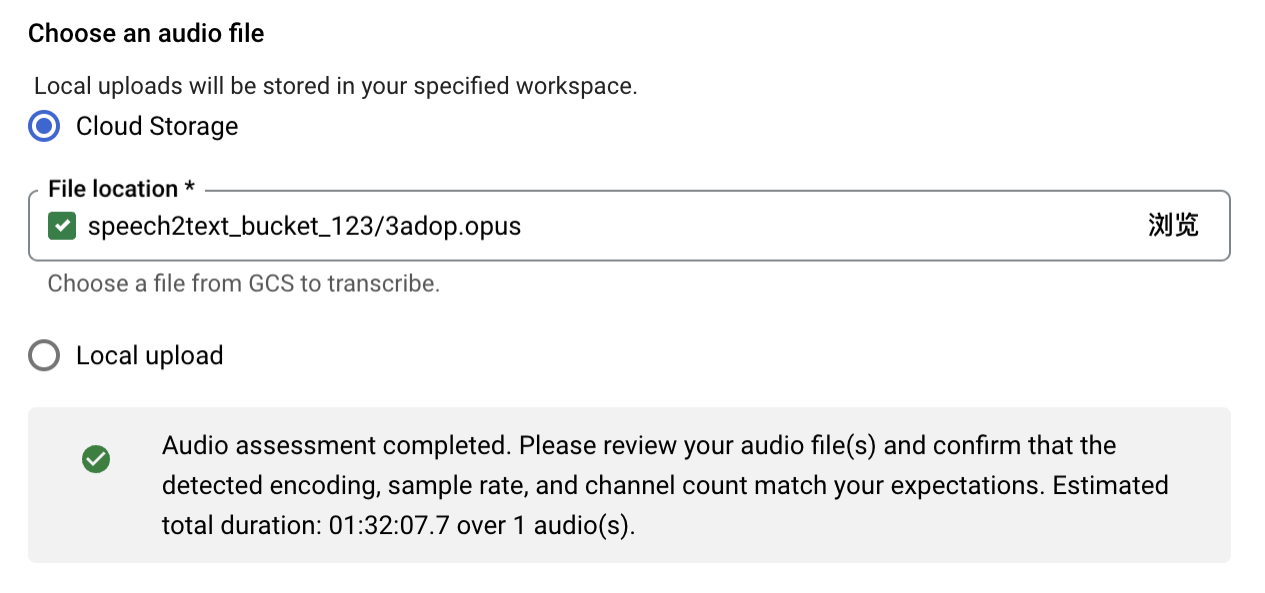
If you select a file that has already been uploaded to Cloud Storage, the system will automatically fill in the speech type, sampling rate, and other information, as shown in Figure 2.
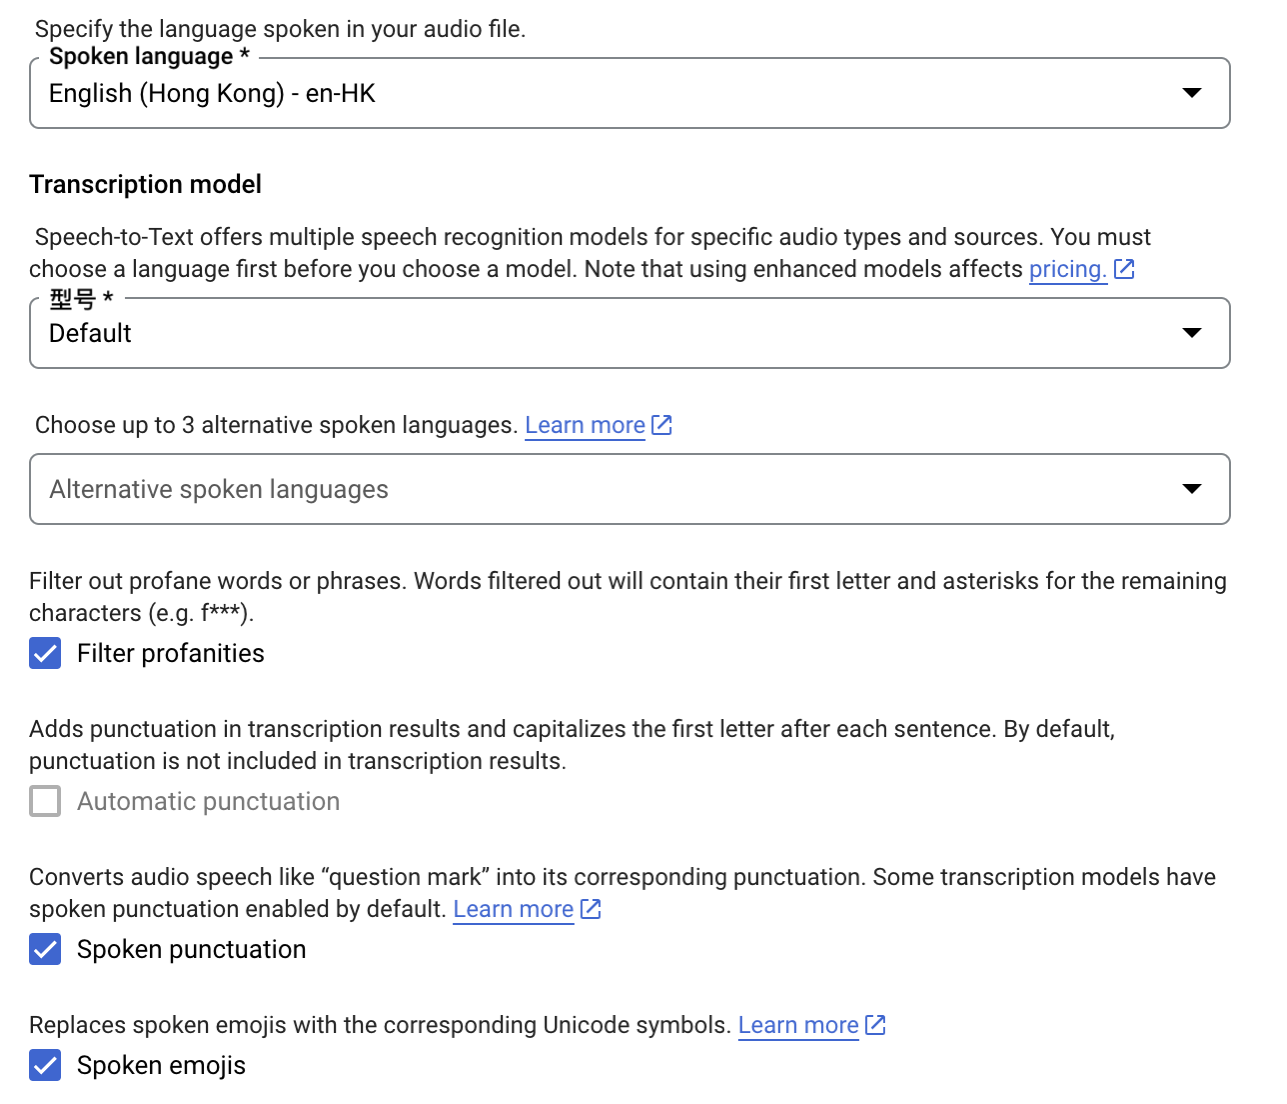
Next, we need to enter the language used in the audio file. For example, English has different dialects such as British English, American English, Hong Kong English, and Singaporean English. We can also choose to add translation for three languages. Users can check the corresponding options according to their needs, such as converting the speaker’s emotions into corresponding expressions or converting the described punctuation into corresponding symbols, as shown in Figure 3.
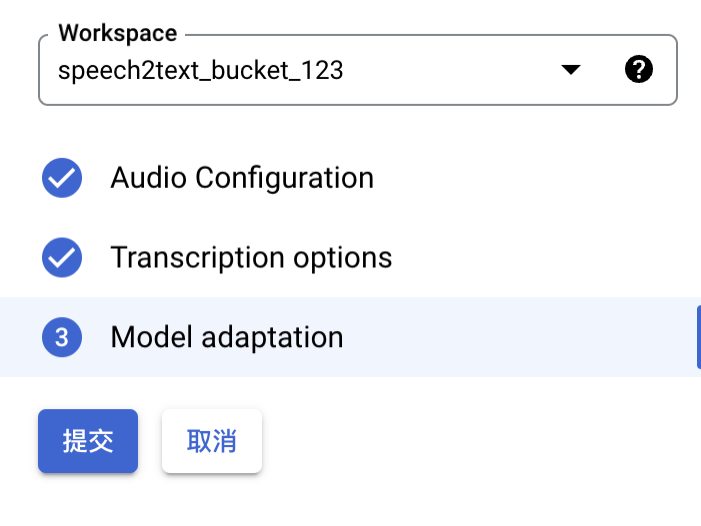
In the next step , check the option to enable the model’s adaptive function according to your needs, and then click the “Submit” button to start processing the file. As shown in Figure 4, the file begins to be processed.
When the file processing is complete, a green checkmark will appear on the left side of the file. Click on the green checkmark to download the transcript. You can choose the file format you want to download, including CSV or TXT files, as shown in Figure 5.

Now, we have successfully converted the speech file into a text file. Then, we need to translate it. The method used in this article is to directly download the JSON file from Cloud Storage, as shown in Figure 6. Then, we use Python to connect to the translation API for translation.
Translation API
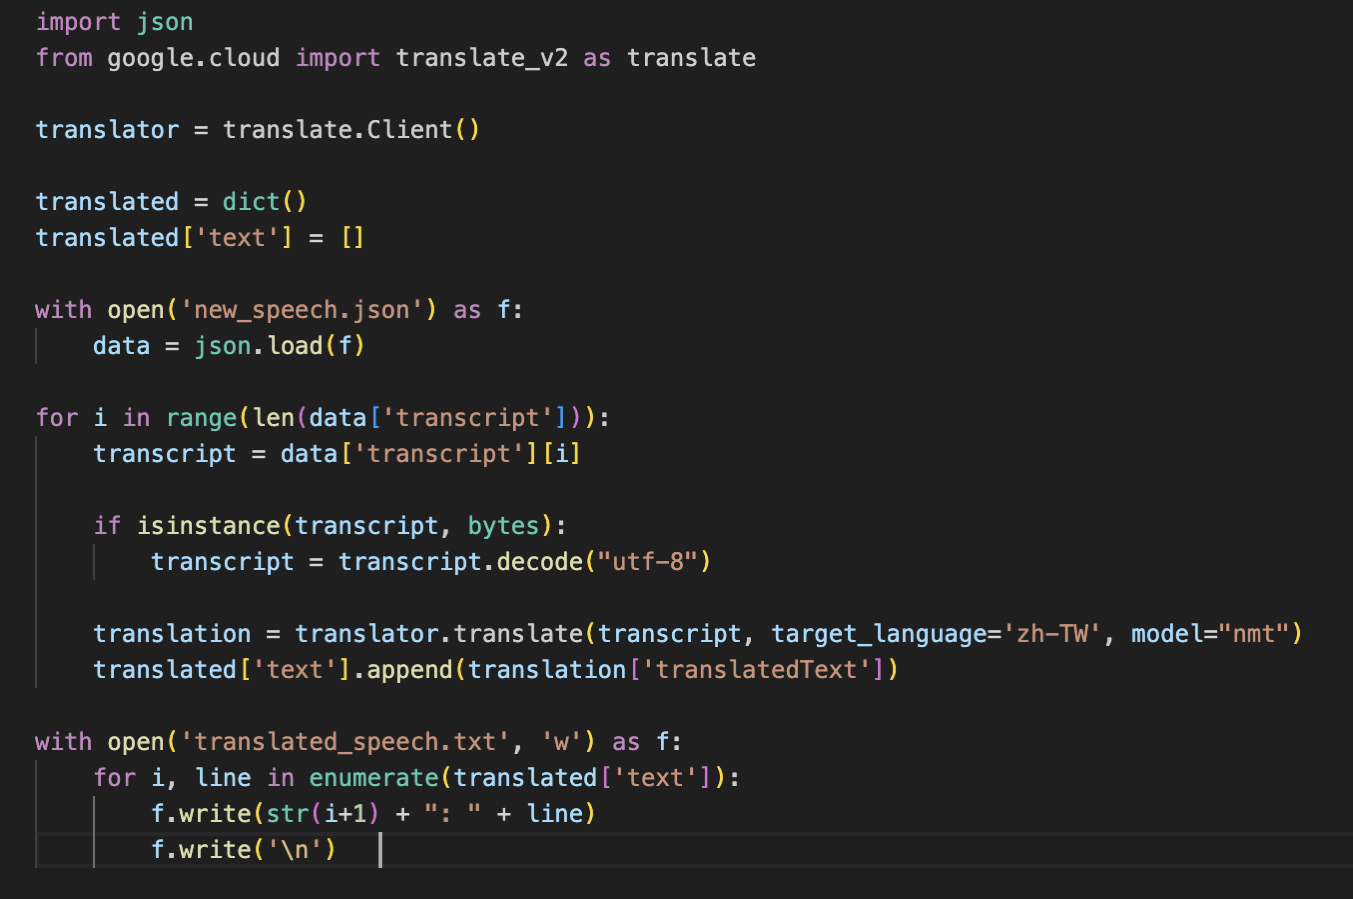
We have used the new_speech.json file, which is a speech-to-text file downloaded from Cloud Storage. The following code shows how we use the API to translate English to the target language zh-TW, using a Neural Machine Translation (NMT) model, and save the result as a txt file. If you download the generated transcript file directly, you can choose settings such as whether to include timestamps and file type. Compared to downloading the JSON file and connecting to the API for translation, downloading the transcript file directly can more directly obtain the desired file content and type.
summary
In summary, this article introduces how to use the UI interface of the Google Cloud platform for speech-to-text and translation. By uploading files to Cloud Storage and using the UI interface to create settings and fill in the required speech information and language options, the resulting transcription file can be downloaded as a CSV or TXT file. Next, using Python to connect to the translation API can translate the transcription file. If you need to directly obtain the desired file content and type, you can choose to download the transcript file. Through these steps, users can quickly and effectively perform speech-to-text and translation, and can perform more customized settings according to their own needs.
Related Article
Step-by-Step Guide to Live Translation Using Google Cloud AI
Code Source on Github
✨ Github ✨